Before you start, have patients remove earrings and pin up long hair.
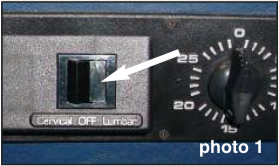
- With the timer off, move the Anatomotor top to Lumbar position. (switch to lumbar)(photo1)
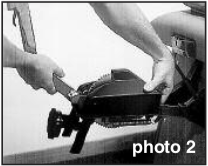
- Insert traction unit into the base plate at the cervical end (photo 2). Then return the table to the cervical position.
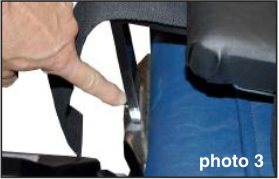
- Insert the CTD into the top bracket at the head end (photo 3).
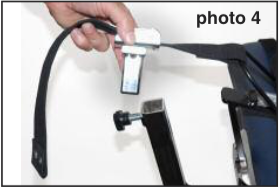
- Remove the long tee in the traction’s control arm and insert the short tee with the web strap attached so it is in the lowest height position (photo 4).
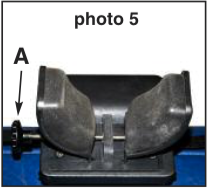
- Spread open the cradle assembly approximately 1-1/2”–2”by turning the adjustment handle counter clockwise (“A”, photo 5 - one full turn will move it 1/16 of an inch). The opening will naturally vary with the size of the neck.
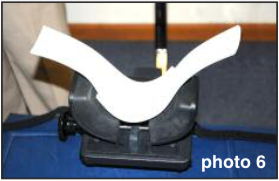
- Cover the white insert pad with Kleenex or a soft paper towel and lay it on top of the upper part of the cervical cradle support (photo 6).
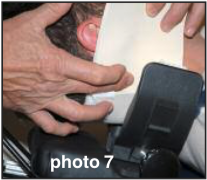
- Position the patient so the upper edge of the cradle pads is just under the occipult (photo 7).
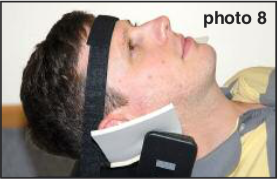
- Tighten the tension knob clockwise until the patient feels a slight inward pressure. You will not sense this through the knob and will have to ask the patient when they first start feeling the inward pressure. Each one full turn will move the cradle assembly 1/16 of an inch. Then attach the forehead strap. The strap is stretchable but do not pull this tight. Just a nice comfortable fit is all that is required (photo 8).
- Make certain the traction poundage dial is set to the lowest poundage.Turn the dial counter clockwise until you feel it stop. At the lowest setting, there is approximately 5-7 lbs. of friction built into the traction unit.
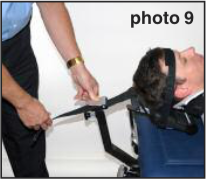
- Pull the web strap firmly through the buckle assembly. If you push up on the traction arm toward the cervical device approximately 1-2”, it will be easier to take the slack out of the web strap (photo 9).
- If your table has the variable speed feature, a slower setting for the traction pull can be obtained. A good average setting is 6–8 seconds of pull and release. If not contraindicated, the upper set of back rollers will help relax the patient’s mid and upper thoracic area.
- To start the table movement and traction, turn the timer to the desired time usually 7-10 minutes.
- Increase the pull by turning the traction dial clockwise. Go slowly 5-10 lbs. at-a-time. Let the table pull, then dial in the rest mode (as the top is returning to the head end). It is advisable to palpate the cervical area so you can determine if the patient is receiving enough traction force. Also get the patient’s feedback as to their comfort. As you increase the poundage, if there is any sliding of the cradle support, stop the table, reposition the cradle pads under the occipult and increase the inward pressure by turning the Adjustment knobs.
- When the treatment time has ended, the table top will stop at the cervical end. Turn the poundage dial down (all the way counter clockwise).
- Remove the forehead strap and turn the knob counter clockwise 4 or 5 full turns to release the patient comfortably from the device.
SAFETY
- Cervical traction will occasionally increase circulation. Some patients may experience some slight lightheadedness. Have them rest on the table for a few minutes.
- It is advisable to be in attendance (within a verbal or visual distance) in case the patient ever experiences any discomfort.
- Be conservative. More is not always better.(10-30 lbs. is normal) Start at the lower setting 10-20 lbs. Once a patient is relaxed, the traction will be more effective. Depending on the neck size, a maximum of 40 lbs. should not normally be exceeded.
Download the attached PDF to view a printable version of this article.