The Scoliosis Package on the Hill AFT Table is very easy to use.
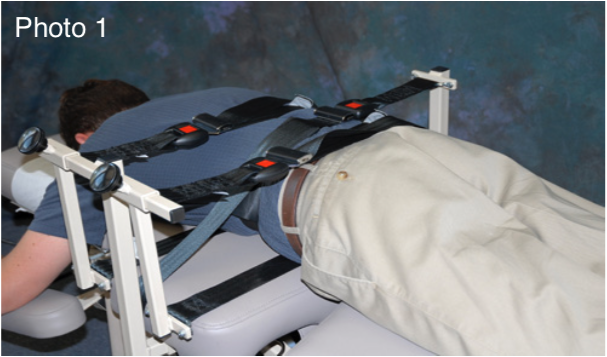
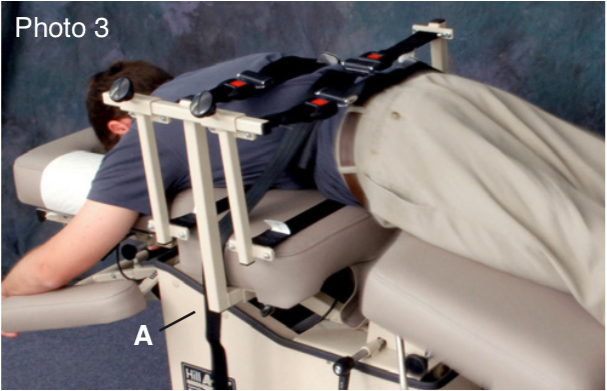
There are two brackets — each slides into a receptacle under the thoracic section of the table (“A”, photo 3). The brackets are interchangeable and each may be used on either side of the table. To position the patient, place each belt flat, across the thoracic cushion. Have the patient lie prone on the table, resting his or her abdomen across the belts. Wrap each belt around the patient as shown in photo 1 and click each belt buckle.
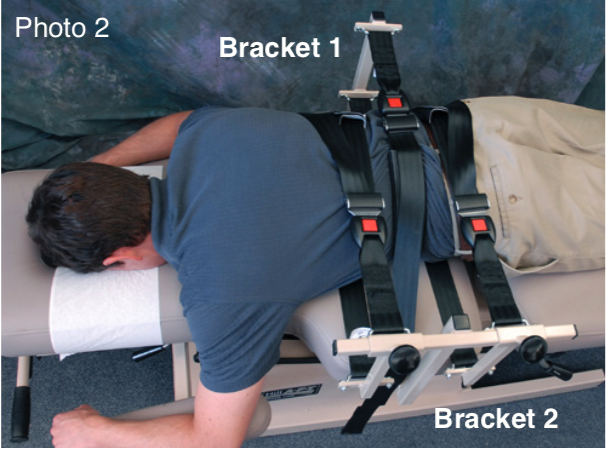
Place the single belt from bracket 1 in the center of the patients back — on the apex of the scoliatic curve. Position the belts from bracket 2 — one above center and one below center as shown in photo 2. Loosen the black knobs on bracket 2 to slide each belt sideways. Tighten each knob once positioned. When finished, the two belts from Bracket 2 should be at the top and bottom of the C-curvature with the single belt of Bracket 1 pulling the opposite direction on the convex area.
Each belt is adjustable in length. Tighten each belt firmly so that it effectively brings the scoliatic curve in the direction of proper spinal alignment. Again, be sure that each belt buckle is clicked securely.
Once the patient is positioned and secured, automatic flexion may begin. Treatment time is left to your professional discretion but generally should not exceed 30 minutes.
Download the attached PDF for a printable version of this article.