Replace the EPM chip due to cF fault
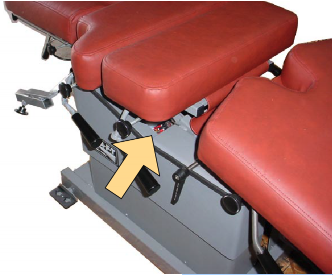
The drive is located in this area under the thoracic section. You do not need to remove anything to view the LED window that shows the fault codes.
AFT with "cF" Fault Code (Replace the EPM chip)
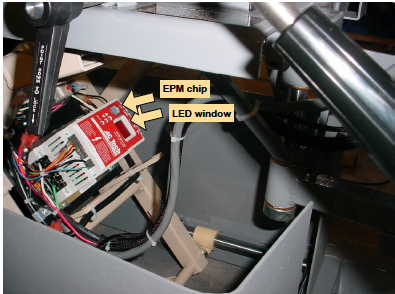
Location: As you face the top of the AC Tech drive where the label is visible, the EPM chip is just to the left of the LED window. The chip is either gray or light blue. There is either a handwritten check mark or an "X" on the top surface of the chip. The replacement must have the same mark.
Removal: Pull the chip straight out of its socket with needle nose pliers or catch the blade of a very small screwdriver under the top edge of the chip and lift up.
If the EPM chip is replaced and a fault code is still visble than follow the steps of A or B instructions, if either description matches yours.
- If the chip has the correct mark on it then the drive itself is probably bad. One last thing to try before ordering a new drive is to manually remove the fault code .
-Unplug the table
-Remove the wires to terminals 1 and 11 on the AC Tech drive.
-Plug table back in for at least 30 seconds
-Unplug table and reattach the two wires
-Plug the table in and see if there are three dashes instead of the "cF" fault code.
2. If the original chip had an "X" and the new one had a check mark then try these steps. This is an attempt to convince the drive to read the other version of EPM. NOTE: This only works if the original has an "X" and the new doesn't.
-Press MODE
-press the "UP ARROW" until the LED reaches value of "25"
-press MODE again (PAR should be on LED)
-press UP or DOWN arrow to get to value of "48"
-press MODE
- press UP or DOWN ARROW to get to value of "06"
-press MODE (this saves the value)
If three dashes appear in LED window then the problem is fixed.