INS-61
Parts Required: H1287
1. Drop the outside skirt by removing the screws around the perimeter of the top. Then remove the top of the table (for mat tables, this involves the removal of 8 bolts which hold the top to the scissors). Next, remove the inside skirt by removing the 8 screws which fasten it to the base. Now you can freely access the bushing assembly.
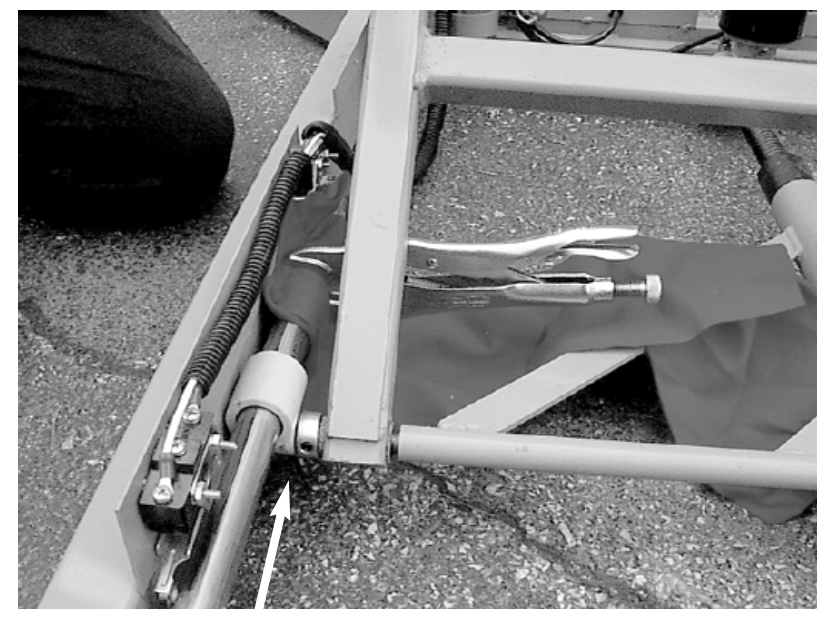
2. Remove all 4 set screws from the lock collars that hold the ends of both glide rods.
3. With set screws removed, grasp the end of the rods with a vicegrip and turn the them repeatedly in a clockwise-counterclockwise fashion until they are loose. NOTE: Even if the B-1 bushing is only damaged on one side of the base, it is still necessary to remove the rods from both sides.
4. Once loose, pull the rods about half way out so that the ends come through the bushings.
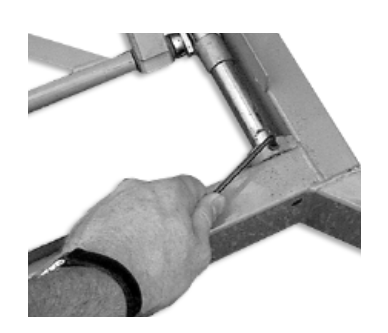
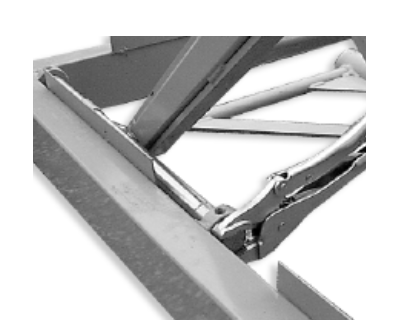
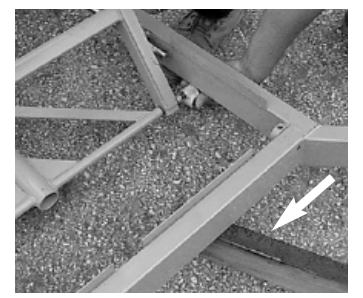
5. Now adjust the height of the table to about 1/2 way up. Place a 2x4 under the base (see photo). Now, press down on the top of the scissors so that the broken bushing can slide off of the pin and under the base for removal.
6. Slide a new bushing on by pressing the scissors down as in step 5.
7. Slide the rods back through the new bushings and into the lock collars. Replace the set screws in the lock collars and tighten them. Finally, replace the skirts and the table top.
What to do if you have trouble removing the glide rods on the Hill Adjustable.
If you have trouble removing the glide rods, do the following. Important note: The following technique should only be used as a last result. It is “tricky” and , if not performed properly, could result in further damage to the table. Do not proceed without protective eye wear..
1. Adjust the height of the table so that it is about 1/2 way up.
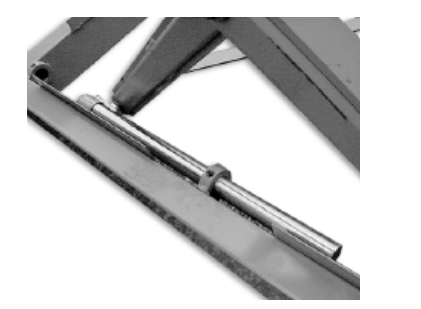
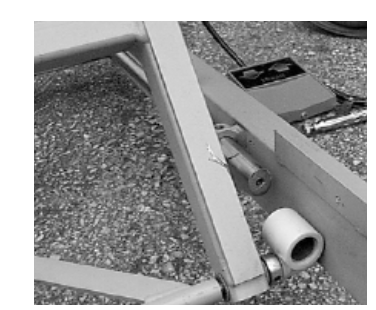
2. Wrap a thick cloth (or one that is folded over several times) around the glide rod so that it is placed about 1 inch from the bushing towards the center of the table (as shown in photo). IT IS VERY IMPORTANT THAT THE CLOTH IS THICK ENOUGH SO AS TO PROTECT THE GLIDE ROD FROM SCRATCHING OR SCORING! With another vice-grip and rag, do this exact thing to the glide rod on the opposite side of the table so that they are clamped in a parallel position.
3. With vice-grips in place, gently press the HEIGHT foot pedal on the “UP” side until it butts up against the vice-grips. Now press the pedal again on the “UP” side so that the present bushing applies pressure to the wrench until the glide rod breaks loose. CAUTION! Be very careful not to force this technique too hard or too long! If the rod does not break free immediately, do not continue. This can result in bending the scissors assembly which would then need to be replaced.
4. If, after trying this technique, the rod has still not broken free, contact Hill Laboratories directly