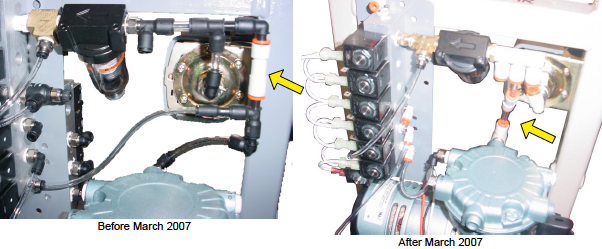
GAIN ACCESS by removing the screws on both sides of the table that secure the plastic enclosure. There are two more screws at the head end.

1. CHECK VALVE
Turn the table off with air in the system. Disconnect the hose where it enters the check valve from the compressor side. If air escapes then follow the steps on the next sheet to replace the Check Valve. If not, go to page 3 and check the unloader valve.
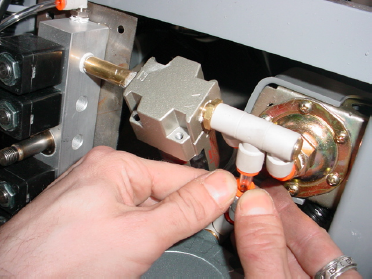
With your two thumbs, push DOWN hard on the ring at the top end of the check valve. Push with enough pressure to compress the ring and, in the same downward motion, push the check valve off the tubing. The photo below shows what you will have as a result.
Place your fingers underneath the check valve, as shown, and push UP on the ring at the bottom end of the check valve with enough force to compress the ring and also pull the valve from the tubing.
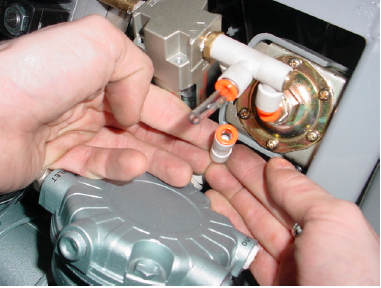
Take note of the arrow on the check valve. It should point UP, away from the compressor, when installed. Push the bottom of the valve very firmly onto the tubing that comes from the compressor. Insert the other tube in the top end.
2. UNLOADER VALVE
1. Check to make sure the white wire did not come out of the crimp connector. To do this give a very gentle tug on the wire where it enters the yellow connector.
2. Check to see if the coil at the unloader went bad by swapping it with a functioning coil.
TOOLS NEEDED: 9/16" wrench
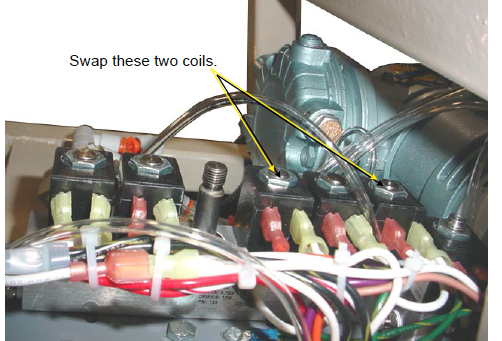
Plug table in and turn power on. Wait 5 minutes to see if compressor shuts off. If it shuts off - replace coil. If it continues to run - replace the unloader valve stem (3-way, normally open)
3. PRESSURE SWITCH
An older version of pressure switch, made with a black enclosure instead of gray, had a separate needle valve which could be replaced. No need to replace the pressure switch itself.