1. The actuator can be accessed from the bottom side of the table by turning the table upside-down.
2. Use the pedal to adjust the length of the actuator to hold a block of wood between the end of the actuator adapter and the base with just enough pressure to hold the wood in place. Too much pressure will make the next step impossible.
3. Unpin the actuator from the base. No tool is required since the pin is self-locking. The springloaded barb can be pushed in with a fingernail or screw driver to release it.
4. Use a 3/32" hex wrench to loosen the set screw that is on the top side of the adapter adapter (see photo).
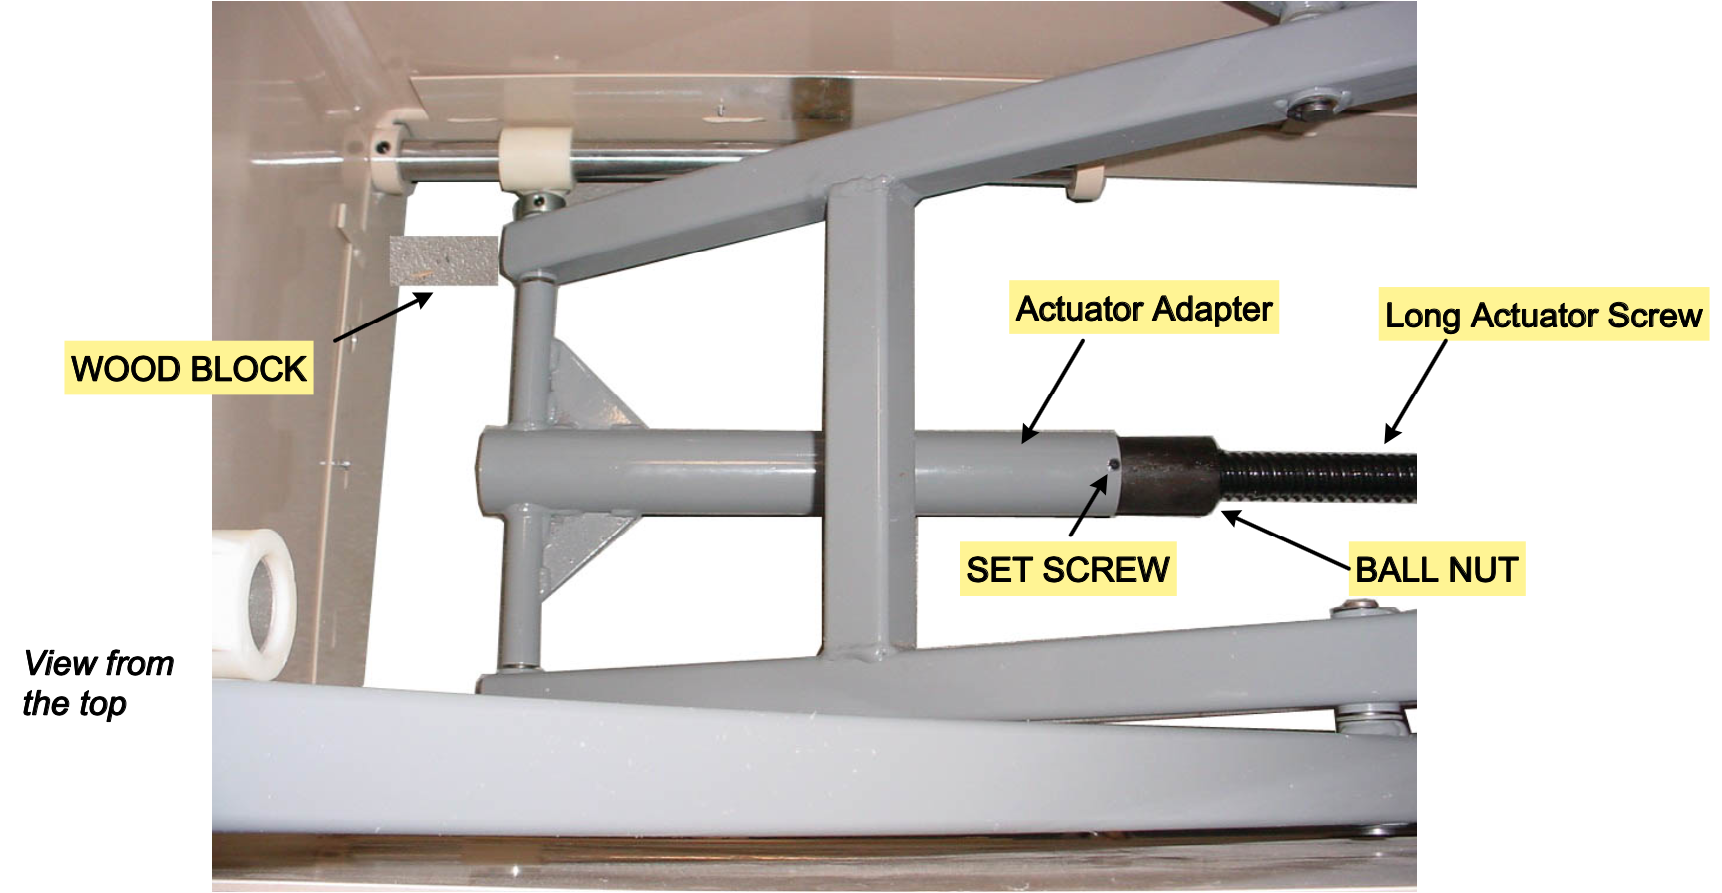
5. Turn the black ball nut counterclockwise to unthread it from the actuator adapter.
6. Unplug the table from the wall receptacle and disconnect the three wires from the motor. White to the power cord. Black & Red to the capacitor. Take note for connecting the new motor.
7. Insert the long black screw from the new actuator into the end of the actuator adapter. Thread the ball nut into the adapter carefully to avoid crossthreading.
8. Tighten the set screw on the actuator adapter to prevent separation during normal operation.
9. Attach the wires from the new motor.
10 Plug the power cord into the receptacle and use the pedal to extend the actuator until the mount hole of actuator aligns with the hole in the end of the base.
11. Insert the self-locking pin.