INS-104B
Parts Required: None
1. Remove the small plastic cover located just under the front edge of the pelvic cushion to access the pictured components. The pelvic drop version is pictured.
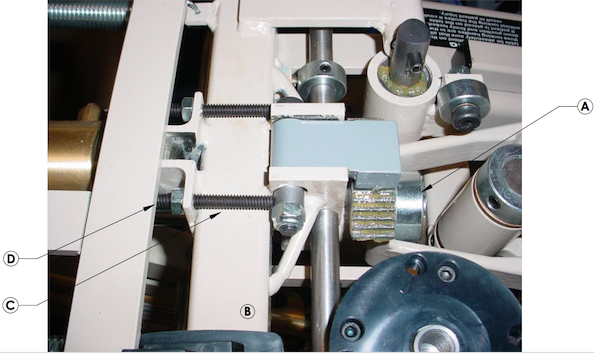
2. Check the rotation pivot (yoke) casting to make sure it is bound very tightly between the chrome lock collar (A) and the
collar that is welded to the bottom side of the crossbar (B). If they have shifted apart then loosen the set screw on the bottom of the crossbar, clamp the three parts together as tight as possible, and tighten the screw again very tight.
3. Tension on the lock itself can be increased by adjusting the two long set screws (C). Use a 7/16" open wrench and 1/8" hex wrench to loosen the lock nut (D) at the end of the set screw.
4. Use the hex wrench in the end of the set screw to turn it 1/4 turn and check the tension on the locking handle. Adjust to a firm tension that is satisfactory to you.
5. Tighten the lock nuts.